Hi Everyone,
We have been working on Unity WebGL build almost for a 2 month. We are about to release the WebGL build but we had faced a lot of struggle.
Due to lack of tutorials or documentation for Unity WebGL build there were lots of stuff we had to resolve. Now we have resolved most of the issues and our Game is working on 2GB Ram (WebGL Memory Size: 400 in Publish Settings) on almost every browser. (Not every unfortunately).
Now I want to share my all knowladge about Unity WebGL so someone who stucked or doesn’t know where to start can benefit from this article.
Firstly sorry for my English grammar 🙁
I will try to explain most important things for WebGL build step by step and I will try to give important hints.
Step 1: – Customize Loading Screen –
Normally you will see Unity’s default loading screen like below.
Now we will change this screen also we will create our own template. So if you are using auto build systems like Jenkins you don’t have to customize loading screen every single time.
First of all when you build for WebGL you will see 3 files.
First of them “index.html” file. This file lead browsers navigate your content and run it. Second of them TemplateData folder which contains loading screen textures and template scripts. Last of them Release folder.
We will change “index.html” file and TemplateData folder to customize and create our own loading screen template.
Open your “index.html” file with text editor.
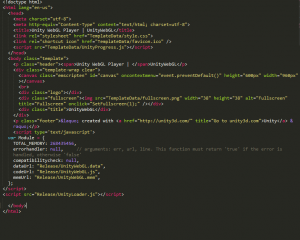
This is what our “index.html” look like. Now when we finish creating template we won’t see “Unity Logo” or “Full Screen Logo” on the bottom of the loading screen.
Now let’s start with removing bottom bar. Remove these lines from your “index.html” file:
<br>
<div class="logo"></div>
<div class="fullscreen"><img src="TemplateData/fullscreen.png" width="38" height="38" alt="Fullscreen" title="Fullscreen" onclick="SetFullscreen(1);" /></div>
<div class="title">LegendaryTeam</div>
Okay we removed the bottom bar. Now I want to make my WebGL build fit as a full screen in every resolution (this works also if you are building for a “Facebook Canvas”).
Change this line:
canvas class="emscripten" id="canvas" oncontextmenu="event.preventDefault()" height="600px" width="960px">/canvas>
with this:
canvas class="emscripten" id="canvas" oncontextmenu="event.preventDefault()">/canvas>
Now your “index.html” looks like this:
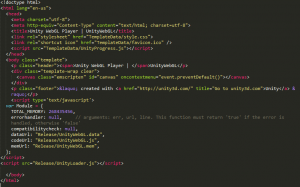
I will add my loading screen a background, progress bar and a text element. Now I will add their reference to my “index.html” file so I can reach them from .css file.
Now add these lines to your “index.html” file just under the canvas> tag:
<div class="backgroundpicture"></div>
<div id="loadingBox">
<div id="bgBar"></div>
<div id="progressBarBackground"></div>
<div id="progressBar"></div>
<p id="loadingText">Preparing Weapons...</p>
</div>
Okay we have one thing left to do with our “index.html” file. We need to change it as a WebGL template format to use it from Unity inside. (See also : Unity Templates )
Just change your game name with %UNITY_WEB_NAME% also change this lines:
<script type='text/javascript'>
var Module = {
TOTAL_MEMORY: 734003200,
errorhandler: null, // arguments: err, url, line. This function must return 'true' if the error is handled, otherwise 'false'
compatibilitycheck: null,
dataUrl: "Release/WebGL.data",
codeUrl: "Release/WebGL.js",
memUrl: "Release/WebGL.mem",
};
</script>
<script src="Release/UnityLoader.js"></script>
with this : %UNITY_WEBGL_LOADER_GLUE%.
Now we are done with “index.html” file. It must be look like this:
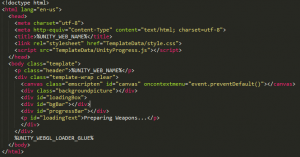
Now give a break and prepare your textures.
1-) General background
2-) Progress Bar Outside
3-) Progress Bar Inside (Loading Part)
Let’s move on. Open your “TemplateData” folder and remove unnecessary textures (we won’t use them) like “fullbar.png”, “fullscreen.png”, “loadingbar.png”, “logo.png” and “progresslogo.png”.
Now copy and paste your textures to this folder. Now rename your background texture as a “backgroundTexture.png”, your loading bar as a “loadingBar.png” and your loading bar inside as a “loadingProgress.png”.
Okay open your UnityProgress.js file and delete every line and copy paste this lines:
function UnityProgress (dom)
{
this.progress = 0.0;
this.message = "";
this.dom = dom;
var parent = dom.parentNode;
var loadingBox = document.getElementById("loadingBox");
var bgBar = document.getElementById("bgBar");
var pBarBackground = document.getElementById("progressBarBackground");
var pbar = document.getElementById("progressBar");
var loadingText = document.getElementById("loadingText");
var bgBarHeight;
var bgBarWitdh;
var pBarBackgroundHeight;
var pBarBackgroundWitdh;
this.SetProgress = function (progress)
{
if (this.progress &lt; progress)
this.progress = progress;
if(progress &lt; 0.5){
this.SetMessage("Preparing...");
}
else if(progress &gt;= 0.5 &amp;&amp; progress &lt; 1){
this.SetMessage("Running...");
}
else if (progress &gt;= 1) {
loadingBox.style.display = "none";
}
this.Update();
}
this.SetMessage = function (message)
{
this.message = message;
this.Update();
}
this.Clear = function()
{
loadingBox.style.display = "none";
}
this.Update = function()
{
if(bgBar.currentStyle)
{
/****************************************
IE Opera
****************************************/
bgBarWitdh = bgBar.currentStyle.width;
bgBarHeight = bgBar.currentStyle.height;
}
else
{
/****************************************
Firefox needs the full css code to work
****************************************/
bgBarWitdh = getComputedStyle(bgBar,'').getPropertyValue('width').replace('px','');
bgBarHeight = getComputedStyle(bgBar,'').getPropertyValue('height').replace('px','');
}
if(pBarBackground.currentStyle)
{
/****************************************
IE Opera
****************************************/
pBarBackgroundWitdh = pBarBackground.currentStyle.width;
pBarBackgroundHeight = pBarBackground.currentStyle.height;
}
else
{
/****************************************
Firefox needs the full css code to work
****************************************/
pBarBackgroundWitdh = getComputedStyle(pBarBackground,'').getPropertyValue('width').replace('px','');
pBarBackgroundHeight = getComputedStyle(pBarBackground,'').getPropertyValue('height').replace('px','');
}
var length = ((pBarBackgroundWitdh * Math.min(this.progress, 1)));
pbar.style.width = length + "px";
pbar.style.height = pBarBackgroundHeight + "px";
loadingText.innerHTML = this.message;
}
this.Update ();
}
Let me make a quick explanation about what this code do. In the above we are finding element references and assign them to variables. In the “SetProgress” function we are assigning loading progress (which changes between 0 and 1) and changing text with “SetMessage” function. “Clear” function removes elements hidden when loading is finished.
In “Update” function we are calculating progress and assigning progress bar’s witdh and height.
Now Open your “style.css” file and delete all lines and paste this lines:
/****************************************
==== RESETS
****************************************/

html,body,div,canvas
{
margin: 0;
padding: 0;
}

canvas
{
width: 100%;
height: auto;
}

::-moz-selection
{
color: #333;
text-shadow: none;
}

::selection
{
color: #333;
text-shadow: none;
}

.clear:after
{
visibility: hidden;
display: block;
font-size: 0;
content: " ";
clear: both;
height: 0;
}

.clear
{
display: inline-table;
clear: both;
}

/* Hides from IE-mac */ * html .clear { height: 1%; } .clear { display: block; } /* End hide from IE-mac */

/****************************************
==== LAYOUT
****************************************/

html, body
{
width: 100%;
height: 100%;
font-family:
Helvetica,
Verdana,
Arial,
sans-serif;
}

body { }

p.header, p.footer
{
display: none;
}

.template-wrap
{
position: relative;
top: 50%;
left: 50%;
-webkit-transform: translate(-50%, -50%);
transform: translate(-50%, -50%);
}

.template-wrap canvas
{
margin: 0 0 -5px 0;
position: relative;
z-index: 9;
box-shadow: 0 10px 30px rgba(0,0,0,0.2);
-moz-box-shadow: 0 10px 30px rgba(0,0,0,0.2);
}

div.backgroundpicture
{
width: 100%;
height: 100%;
position: absolute;
top: 0;
margin-top: 0px;
background: url(backgroundTexture.png);
background-size: 100% 100%;
background-repeat: no-repeat;
z-index: -5;
}

div#loadingBox
{
width: 650px;
height: 100px;
position: absolute;
top: 0;
left: 50%;
margin-top: 60px;
margin-left: -325px;
text-align: center;
}

div#bgBar
{
position: absolute;
width: 650px;
height: 100px;
background-image: url(loadingBar.png);
background-repeat: no-repeat;
background-position: center;
z-index: 5;
}

div#progressBarBackground
{
position: absolute;
width: 650px;
height: 95px;
margin-top: -1px;
background-image: url(loadingProgressBackground.png);
background-repeat: no-repeat;
background-position: center;
z-index: 3;
}

div#progressBar
{
position: absolute;
margin-top: 0;
margin-left: 90px;
background-image: url(loadingProgress.png);
background-repeat: no-repeat;
background-position: left;
z-index: 4;
}

p#loadingText
{
color: #FFFFFF;
letter-spacing: 1px;
position: absolute;
width: 100%;
font-family: "Arial", sans-serif;
font-weight: bold;
text-align: center;
vertical-align: center;
text-shadow:
-1px -1px 0 #000000,
1px -1px 0 #000000,
-1px 1px 0 #000000,
1px 1px 0 #000000;
font-size: 21px;
top: 0;
margin-top: 33px;
z-index: 6;
}

body.template { }
.template .template-wrap { }
.template .template-wrap canvas { }
This is our css file which allow us to place our textures and texts in appropriate places. I won’t explain everything in this file so if you have a question you can google about css or send a message to me.
Just be careful about “background-image: url(loadingProgress.png);” you have to write exact names for textures (locates on “TemplateData” folder).
Now we successfully complete our “Loading Screen Template”. Let’s insert this into the Unity so we can select this template and use for builds. Create a folder inside “Assets” folder in your Unity project. Rename it as a “WebGLTemplates”. Create one more folder and give it a name what ever you want. I will give it “UnityWebGL”.
Now copy your “index.html” file and TemplateData folder and paste inside “UnityWebGL” folder and done we achieved it 🙂
Now let’s look at what we achieved. Inside Unity open “Player Settings” for WebGL and click “Resolution and Presentation” tab. Now you can see one more template as a “UnityWebGL” now select it and build to see your own loading screen.
Also see this : Custom Loading Screen
Hints about Loading Screen :
1-) You can create thumbnail.png and paste it to template folder in Unity. This way you can see what your loading screen look like from Inspector.
2-) We made horizontal loading screen. If you want to make it vertical just change the lines in “UnityProgress.js” like this:
var length = ((bgBarHeight * Math.min(this.progress, 1)));
pbar.style.height = length + “px”;
pbar.style.width = bgBarWitdh + “px”;
loadingText.innerHTML = this.message;
3-) You can’t directly open “index.html” file which we create for template. You have to Build from Unity so Unity will insert necessary files to “index.html”.
Step 2 : – Optimization –
-Because of browser’s will “eat” your user Ram you have to reduce “WebGL Memory Size” as you can. We have succeeded to reduce it 400.
-If you have big texture atlas use Unity’s “Asset Bundle” system. Load necessary assets in their places and remove them whenever you are done with them. -Compress all your textures as you can.
-Don’t use reflection in your code.
-Don’t use “Update” function too much in your code.
Step 3 : – General Bugs and Tips about WebGL –
When you build your project for the first time for WebGL most probably you will encounter crashes. Let’s get rid of them.
Firstly and the most important thing is “try-catch” blocks. YOU CAN’T USE THEM IN WEBGL BUILD. THEY WILL CRASH WEBGL IF CATCH BLOCK WORKS. If you are using “try-catch” blocks replace all of them with “null (if)” checks.
Interesting thing is here when you get an error on WebGL you want to get “Development” build and see what is wrong. And you will open exceptions to “Full” or “Explicitly Thrown Exceptions Only” from “None”. But you won’t get that error’s again because Unity will place some emscripten codes and “try-catch” blocks will work. AGHHHH!
Secondly remove all threads from your code.YOU CAN’T USE THEM IN WEBGL BUILD. THEY WILL CRASH WEBGL IF THREAD WORKS.Change them with “Coroutines”. (See also : Getting Started with WebGL )
Lastly don’t assign “string.format” variables directly to UI Elements to change sprite via code. First assign them to “string” variable after use this variable for your operations.
Now we are getting build and see that we cleared most of bugs ( I hope 🙂 )
Hints about General bugs in WebGL :
1-) If you want to get “Development” build:
a-) Download “Firefox 64 bit” browser (Only works in there).
b-) Increase “WebGL Memory Size” to 1500.
c-) Enable exceptions to “Full”
2-) Clear all Logs (Debug.Log, Debug.LogError, Debug.LogWarning) before building to WebGL for “Publish”. It will increase your game performance believe me.
Step 4 : – Full Screen Operations Via Code –
You can add your game full screen button so user’s play your game in full screen. This code is pretty easy to use just write a function insert this line to that function:
Screen.fullScreen = !Screen.fullScreen;
Now Unity will handle full screen operations for you!
Hints about Full Screen Operations :
1-) Don’t call full screen function in “OnFingerUp” or “OnClick” (NGUI) methods. Because of Unity will handle full screen operations end of frame, so user have to click somewhere on the screen to go full screen. Instead of that listen “OnFingerDown”(Maybe Raycast to specific layer to determine your button) event and call your function here.
Step 5 : – Plugins –
I will recommend update this plugins to work for WebGL build.
If you are using “Facebook Sdk” plugin update it to latest version for WebGL build.
If you are using “Photon” or “PhotonChat” update them to Photon 4.x versions otherwise they won’t work.
If you are using “Fyber” plugin update it at least 7.2 and update adapters to latest versions.
If you are using “Newtonsoft” json plugin update it to latest version. I think they removed reflections and performance is better now.
I tried to explain important things for Unity WebGL build. I hope I could help someone who stucks.
If you have any questions just sent it to hulusionder@yandex.com and I will try to answer them.